Sunday, 15 February 2015

Mascara Review: Benefit Roller Lash Mascara

This weekend, I tried Benefit's Roller Lash Mascara and LOVED it.

The brush: pink, plastic with the little short 'spikes', and curved. Gives really great control - I could get right against the lid and in the outer corner. Also, an advantage of the curved brush is that you can really push the lashes up and out. This helps to open up your eyes and make 'em pop.


The formula: smooth, wet, but dries fast. Easy to spread equally on the lashes and also layers really well. One downside: a little tough to add more layers on once it has dried. Some mascaras are more malleable than others later in the day - this one dries right up so you can't be lazy and add more if you're going out at night (my style). This one is also long-lasting - doesn't flake or smudge throughout the day...yes! In the fist pic above, the eye on the left is wearing mascara and the right is not. Also, all the pics in the post have NO liner, and NO shadow - JUST mascara.
The verdict: Awesome mascara. Totally recommend.

Pin It

Friday, 26 April 2013

Review - Rimmel Lash Accelerator Mascara


I have been wanting to try Rimmel's lash accelerator mascara for a while now. I haven't yet hopped on the "eye product that makes my eyelashes grow faster" train yet and thought this would be an easy way to try it out. If I liked how the mascara applied, then maybe I could maintain some loyalty and wear it for a full 30 days. According to Rimmel, this mascara and lash treatment instantly make your lashes up to 80% visibly longer and will make them up to 117% visibly longer after 30 days of use. Who knows if I will be patient enough to see this 47% additional increase in length; only time will tell.

I took some before and after pictures; let's take look at some instant gratification:
Not bad! The lashes do appear significantly longer. However, this could just be because most of my lashes are blond and invisible until mascara is applied. Regardless, the end result is great. As for application, it went on OK. Keep in mind, I had to apply several coats to get the effect pictured above (and below). The brush was not really reaching the lashes in the outer corner of my eyes so I tried to apply with just the tip of the brush which did result in a little clumpage that I had to smoothe off with my fingers and try again. Overall, I like the way this mascara applies and will wait to see if that extra 47% of magic makes itself known.
Close up:

View from far:


Pin It

Wednesday, 24 April 2013

Review - Tarte Lip Stain in Spirited


Tarte lip stains are one of my favourite lip products, no questions asked. They are smoothe, moisturizing, last long, and come in beautiful colours. I have owned several of them in the past but was craving a bright, orangey-red for summer so bought myself "Spirited" for my birthday. It's part of Tarte's "LipSurgence lip tint line" which are thick lip pencils that are a hybrid between a stain, a gloss, and a rich lip balm. I love them because they are super easy to apply, are super moisturizing and last for hours! (When they do wear off, it's even and natural and not streaky or chunky-looking). Plus, the packaging is sturdy (I have had some bad experience with lip pencil lids cracking...) so you can just throw it in your purse. Plus, all you need to do is twist up for more product. You can read more about the product and order online here. Sephora carries them too. 
About the colour - I love this one. It's bright and fun and warm. I took some pictures of myself wearing it today before heading off to class. Excuse my spotty application - I was in a rush and didn't notice the lopsidedness until looking at the pictures tonight. 


Pin It

Wednesday, 20 March 2013

Batiste Dry Shampoo - Product Review

Batiste Dry Shampoo - if you own it, you know what I'm about to say. If you don't own it or you have never heard about it before, you better read this and get with the program. Trust me, it will change your life just as it did mine.

What is it? Well, to me, it is time in a can. Let me explain. It is a pressurized spray can with a cool powdery magic mixture in it. It is meant to "refresh hair between shampoos" and, boy, does it ever! Basically, you are supposed to spray on your roots, muss it around with your fingertips a bit, and your hair will look like it was just washed.

This product totally changed my beauty routine. I have oily skin so, ever since my teenage years, my hair starts to look limp, separated, and greasy less than 24 hours after shampooing. This drove me nuts (especially since I have always had bangs which are notorious for getting oily, fast!). I had to wash and shampoo every single morning and, sometimes, by the end of the school or work day, my hair would already look dirty. This not only added time to my daily routine but it is also not good for hair to wash and dry it every day! Using Batiste in the mornings saved me so much time. I no longer had to shampoo every day and my hair looked great.
              
How do I use it? It's. So. Simple. The day after a shampoo, my hair starts to look pretty rough. Here's how I use Batiste: I shake the can and spray at the roots of my bangs, along my part, and on the crown of my head (the top of my head near the back). Then, I use a round brush and a blow dryer to quickly blow out those sections. If you don't have a blowdryer around or don't feel comfortable using one, no worries! Just brush it through with the bristle-iest brush you have. The more bristles, the better - this way, the powder will be distributed most evenly in your hair. If you have curly hair and don't want to brush out your curls - no problem! Just use your fingers to rub in the powder and distribute it evenly throughout your hair.

Here are some before and after photos - be warned, you are about to see some messy, greasy hair.

Bangs before:

Bangs after:

Top of head before:

Top of head after:

See how the hair looks clean, bouncy, and fluffy in the after photos? Also, can you see how my roots actually look lighter? How amazing is that!? For those of us with highlights, this is a serious life saver for in between hair appointments  If you have darker hair and are worried about the lightness of the powder - don't fret! Batiste also comes in darker colours for brunettes! You just have to try out the different types to see what works best for you. Added bonus: the "original scent", clean and classic (pictured above), has a lovely light citrus-y powder scent which adds to the fresh look and feel of your hair.

In addition to different shades, Batiste also comes in different scents. "Wild" (pictured above) is one of my favourites! It has a yummy musky-vanilla scent that I just love.

Batiste has become an essential part of my beauty routine. I actually use it every day now! On those days that I do wash my hair (it happens, ha!), I actually use Batiste once my hair is dry on clean hair. I have a lot of hair, but it's rather fine, and I found that Batiste gives me just the right amount of extra volume. That's right, Batiste isn't just for dirty hair anymore! I'm addicted. A few weeks ago, I went on a trip to New York City and realized, in a panic, that I forgot my Batiste  I immediately went out on a frantic mission to several different pharmacies and could not find it. I settled for another brand but it did not cut it. That's why I make sure to stock up when I can.

You can buy Batiste online at NailPolishCanada.com so make sure to replenish your reserves. Plus, NailPolishCanada is actually holding a contest right now - you can win free 4 free Batiste cans of your choice! Just go here: http://www.nailpolishcanada.com/categories/batiste.html, click on the contest link and fill in your first name and E-mail. You don't wanna miss out!

-Emilie
Pin It

...a BeautySchoolDropouts Update


Hi! This is a short and sweet post letting you all in on my plans for the next little while. From now on, I (Emilie) will be posting about more than just nail polish ...beauty reviews are coming your way! I love beauty products and tend to review them in my head anyway, so why not on the blog? Plus, my brain is so tired of chugging away with grad school this and that, so relaxing in the world of beauty products will be a welcomed change.
I am working on the first review right now...it is one of my top beauty products of all time! Stay tuned... Pin It

Thursday, 7 March 2013

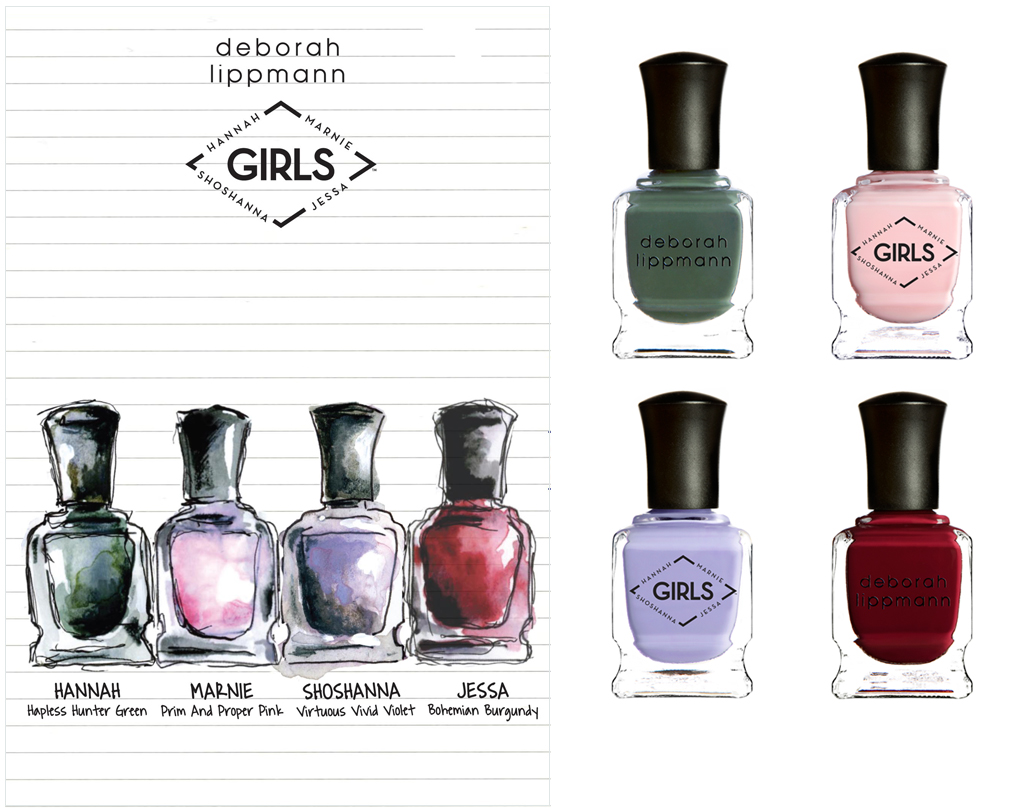
Deborah Lippmann for Girls HBO - Shoshanna


This shade, a "virtuous and vivid violet" is designed around the Girls (HBO) character, Shoshanna. She is so entertaining and this colour is perfect for her personality! A significant portion of my friends actually identity most with this character (funnily enough) and I am positive that most ladies I know would be really into this perfect purple. The polish is a beautiful soft and opaque pastel lavender with a delicate, almost hidden, glitter.


Yep, she's awesome. Also, check out my review of another Girls polish here and make sure to shop online at deborahlippmann.com to buy this set - it's limited edition AND there is a 3-day only 15% off deal! Check it out: 


Pin It

Wednesday, 6 March 2013

The Perfect Spicy Red - Revlon Fearless Review


This shade is a great bright, orange-y red. As always, Revlon applies very well (opaque in two coats) and this colour is exactly what I need at this time of year (hello...March, where is the sun? It still feels like February). Fearless is the perfect hot, juicy red and is an easy drugstore find.

 Natural light (shade)


 Natural light


Natural light (direct)


Pin It

Monday, 4 March 2013

HBO Girls Deborah Lippmann Hannah


The Deborah Lippmann Girls set is just so adorable and amazing. Here, I tried out the green shade - "Hannah". Side note - I absolutely love her character, but I won't get into it here. Let's just say, I can relate. Ha!


I am totally in love with this green. It's soft, dark, and dusty. Check it out! 

 With a flash


 Daylight


 Indoor lamp


Window light

It also goes on great, is opaque with one coat, and has a pretty solid lasting power. New fave!
Pin It

Monday, 13 August 2012

Shellac: Review

For the past two years, I have gone on an annual summer camping trip. It is important for you to know that I was never a camping-type girl (as I'm sure you can all assume from this blog where I write about doing my nails every other day...ha!). In fact, I found a funny poem the other day in a box of old stuff. I used to go to french rock-climbing camp (yeah) and they made us go on this thing called "expe" where we would canoe somewhere and portage a lot and camp somewhere and eat gross food. Needless to say, I hated it. Check out this little ditty I wrote:


Notice the underlined words "wet" and "cold". And the failed poem at the top that I scratched out. Yeah, I wasn't too stoked. 

Expe
Get me out of this tent please
Get me home to my bed
Buy me a bath and a nice hote[sic] (I definitely meant hotel)
If we don't leave here I'll freack[sic] out 4 real
There's a root sticking in my back bone
This tent's real wet and real cold
So let's go go get out here
Cause I wanna go home

Now, all of a sudden, I LOVE camping. No phones, no computers, no alarms, no makeup...the list goes on. Living every day according to the light-dark cycle, eating food you cook on a fire (it always tastes better) - is awesome. Also, the camping spot we go to is a good 25 minute hike from where you can park so you really have to seriously consider what is worth carrying and what is not. And, unfortunately, nail polish is not.

So, this year, I decided to do a shellac for my week-long camping trip. Not necessarily because I want my nails to "look nice", but because I figured it would strengthen them and prevent breakage. I don't know about you guys, but one of my major pet peeves is when my nails break and are scraggly and get caught on everything and potentially could rip down further (ow!). Plus, I thought this would be the perfect opportunity to really put a shellac manicure to the test. So, I went to Nice One Nails here in Ottawa and got a shellac. I opted for a coral-y pink colour because, who are we kidding, I can never turn that colour down. 

For those of you who don't know exactly what a shellac manicure is, I will give you the low down. Basically, it is the same as a regular manicure (base coat, two coats of colour, top coat) but the polish they use is different because it is cured by a UV lamp. In between each coat, your hand sits in a little UV lamp like this:


...and dries (very fast) while the manicurist paints your other hand. Shellac manicures usually range in cost between $25.00 and $40.00. This includes all the prep work the manicurist does (cutting, filing, cuticles, etc). However, I prefer to do this myself (never ever ever cut your cuticles!!!!) and, at Nice one Nails, just a shellac (no prep work) is only $20.00! Totally affordable. So I advise you to file your own nails, push your cuticles back, and then pop in for the shellac part. The end result is a manicure that is instantly dry and is said to last at least 14 days without chipping, smudging, pealing or cracking. Well, we will see, won't we?

This is what my shellac looked like the day after it was done: 


Not bad! (You can already see the camping dirt accumulating, however!) There is no chipping and the manicurist did a good job near the cuticles (ie. nail polish should always stay about 1-2mm away from your cuticles. If the polish touches your cuticles, when your nails grow, a 3D ridge of polish will appear when space increases between the polish and the cuticle. Not a good look. And very tempting to pick.)

The shellac did a great job throughout the camping trip. My nails did not break! Wohoo!

This is what it looked like about 1.5 weeks after it was done (12 days).

 Left hand
Right hand

Yes, I had also been painting some furniture turquoise (if you noticed!). So, let's see. Yes, you can see the polish growing out but that is not a huge problem. There is definitely chipping and I noticed a fair amount of cracking on my nails (you can see cracks in the polish where dirt has settled in. Gross). And the ring finger on my left hand was starting to peel up from the nail so I, of course, picked at it (bad - I know!). 

Now, let's talk about the removal process. If you go into the salon, they soak your hand in a little bowl of acetone and then scrape the polish off with a metal cuticle pusher (or something like that). Most of the polish usually comes off easily, but there is definitely a possibility for some serious scraping on your nail. You can also do this process at home. Personally, I use the "glitter removal method" but with 100% acetone instead of regular nail polish remover. This prevents a lot of the possible scraping. You can buy the acetone at most pharmacies. Now, acetone is pretty rough. Your nails are not going to shrivel up and die, but you will notice that your nails, cuticles, and finger tips will be dried out as a result of this process. Definitely not the best for you, but not the end of the world either. 

My general view on shellac follows: if you aren't too picky about your nails and plan on spending about $40-50 a month on manicures, this is definitely for you. Or, if you are going on a trip, this is definitely the hassle free way to go. If you are trying to grow your nails out (and are trying to avoid breakage), a shellac will also work. However, if you are like me and notice imperfections in your nails and want to fix them, this is not the way to go. The removal process is too time consuming and annoying to do unless you really have to.

Have you tried shellac? 
Ps. Look at me...I'm camping! (My 12 year old self is P.O'ed)


Pin It

Monday, 23 July 2012

Lana Del Rey Nails: Tutorial

Last winter, Lana Del Rey released her awesome music video for Born to Die. When I watched it, one of the first things I noticed about it were the nails (obviously). I promptly recreated the design on my nails and posted about it on the blog. The nails were tipped with a red Vv" outlined in gold glitter. Here is a video snapshot I took of the video:


I can see that a lot of you have been checking out that post, so I thought I might show you, step-by-step, how I recreated this look. 

What you will need for this manicure:
1. Clear base coat 
2. Nude polish (optional)
3. Red polish
4. Gold glitter polish
5. Top coat
6. Small paintbrush
Obviously, you can change up the red polish and gold glitter to other combinations if you wish!

1. Start with a clear or nude base
Here, I simply did a clear base coat on the nail. Use a clear polish if your nails are healthy and not stained - mine are slightly yellowed around the tips, but that will be covered by red polish for this manicure. If you are less inclined to show your natural nail, feel free to use a nude polish instead. 

2. Dot the middle of the tip
Using your small paintbrush and red polish, use a dot to roughly mark where the middle of the nail is on the tip.

3. Dot the middle of the sides
Using your small paintbrush and red polish, use two dots on each nail to mark the middle of the nails on  both edges.

4. Create the "V" shape
This is the slightly trickier part, but the dots are there to make it easier by guiding your brush. With the small paintbrush, connect each side dot from step 3 to the middle dot from step 2. Here, I usually round the lines slightly, creating a bulge and making the "v" slightly concave. However, if you prefer, you can make these lines straight but it takes a little more patience and steady-handedness.

5. Fill in the "V" shapes
Here, you can either use your small paintbrush, the polish brush, or a combination of the two. If using the polish brush, be sure not to stray beyond the lines of the "v"! Cleaning up could be quite the task here (you might have to re-start). To be safe, you could roughly fill in the larger areas with the polish brush and then fill in the leftover, hard to reach spots, with the small paintbrush.

6. Outline the "V" in gold glitter
This part may seem daunting because of the thin line, but it isn't. This is because glitter tends to be forgiving when creating delicate shapes. With glitter, it is not very obvious if the lines are not perfect and the individual glitter bits can be pushed around with a toothpick and pushed into the right shape. That is why I recommend using a glitter for the outlining as opposed to a metallic or opaque polish - glitter camouflages imperfections!

There you go - the infamous Lana Del Rey manicure. In my opinion, this is one of the best manicures out there right now. It is universally flattering and elongates the fingers. Plus, it is pretty sexy. Try out for yourself and you will see!

Pin It