Showing posts with label Holiday manicure. Show all posts

Thursday, 22 December 2011

More Holiday Manicures!

This week, I had the pleasure of getting together with some old friends Maddie and Sophie to get down to some serious holiday nail business. Plus, it was so great to be able to catch up and chat during the manicures. Sophie wanted something wintery and cute and opted for a full snowflake manicure similar to the one I did a little while ago. We used the awesome Sapphire (Designer series) by OPI and then I added some hand-painted white snowflakes. It ended up looking adorable! (This holographic polish is so difficult to photograph! You've gotta see it in person to experience its beauty).

Maddie asked for something feminine but also holiday-inspired so I gift-wrapped her nails! We chose the OPI Designer..de Better from the Muppet line (that I used and reviewed here) for the base and, of course, my favourite red - OPI's Red My Fortune Cookie for the accents and the bow.

This one really looked great. Perfect for this time of year! Good choices, ladies!

Last night, I had a girlie Christmas party to go to so I decided to do a last minute manicure before I stepped out (the best accessory). I thought I would try the Born to Die manicure in different colours. This time, I decided to use a colour as the background instead of leaving the nails bare, so I thought I would use something neutral. I opted for OPI's Barefoot in Barcelona as the base.
For the tips, I chose China Glaze's Icicle and the same Nicole by OPI gold glitter (Twist of Fate) that I used for the original Born to Die manicure.

This is how it turned out:

I like this colour combo - still fancy and party-ready like the original, but slightly less eye-popping. Anyway, must go - gotta get back to wrapping!

Happy Holidays :) Pin It

Tuesday, 20 December 2011

First Day of Hanukkah Holiday Manicure


Happy Hanukkah! This evening marks the first day of Hanukkah and I was drawn to creating a beautiful sparkly Hanukkah inspired manicure.
I used an absolutely breathtaking shimmery royal blue as the base; China Glaze's Frostbite (clearly seasonally appropriate).
This polish has such a beautiful deep colour, is extremely easy to apply, and looks marvelous with only two coats. Plus, the slightly metallic-shimmery appearance hides any nail imperfections and looks pro even without a super steady hand.
Then, I hand-painted the white candles, black wick, and yellow and white flames. And, of course, added the gold and silver sparkle accents (because I can never resist adding a touch - or a serious amount - of glitter). With the silver Star of David on the thumb nails, two hands of four candles on each makes eight! (Thinking ahead!).

Pin It

Thursday, 15 December 2011

Lana Del Rey's Born to Die Manicure

I watched Lana Del Rey's newly released video for Born to Die and was totally inspired. Check it out.


First of all, I am pretty obsessed with her intense voice and whole shtick (see more videos further down in this post). Second of all, the nails! I knew I had to try them as soon as I saw this video. Here are some shots from the video of her nails:


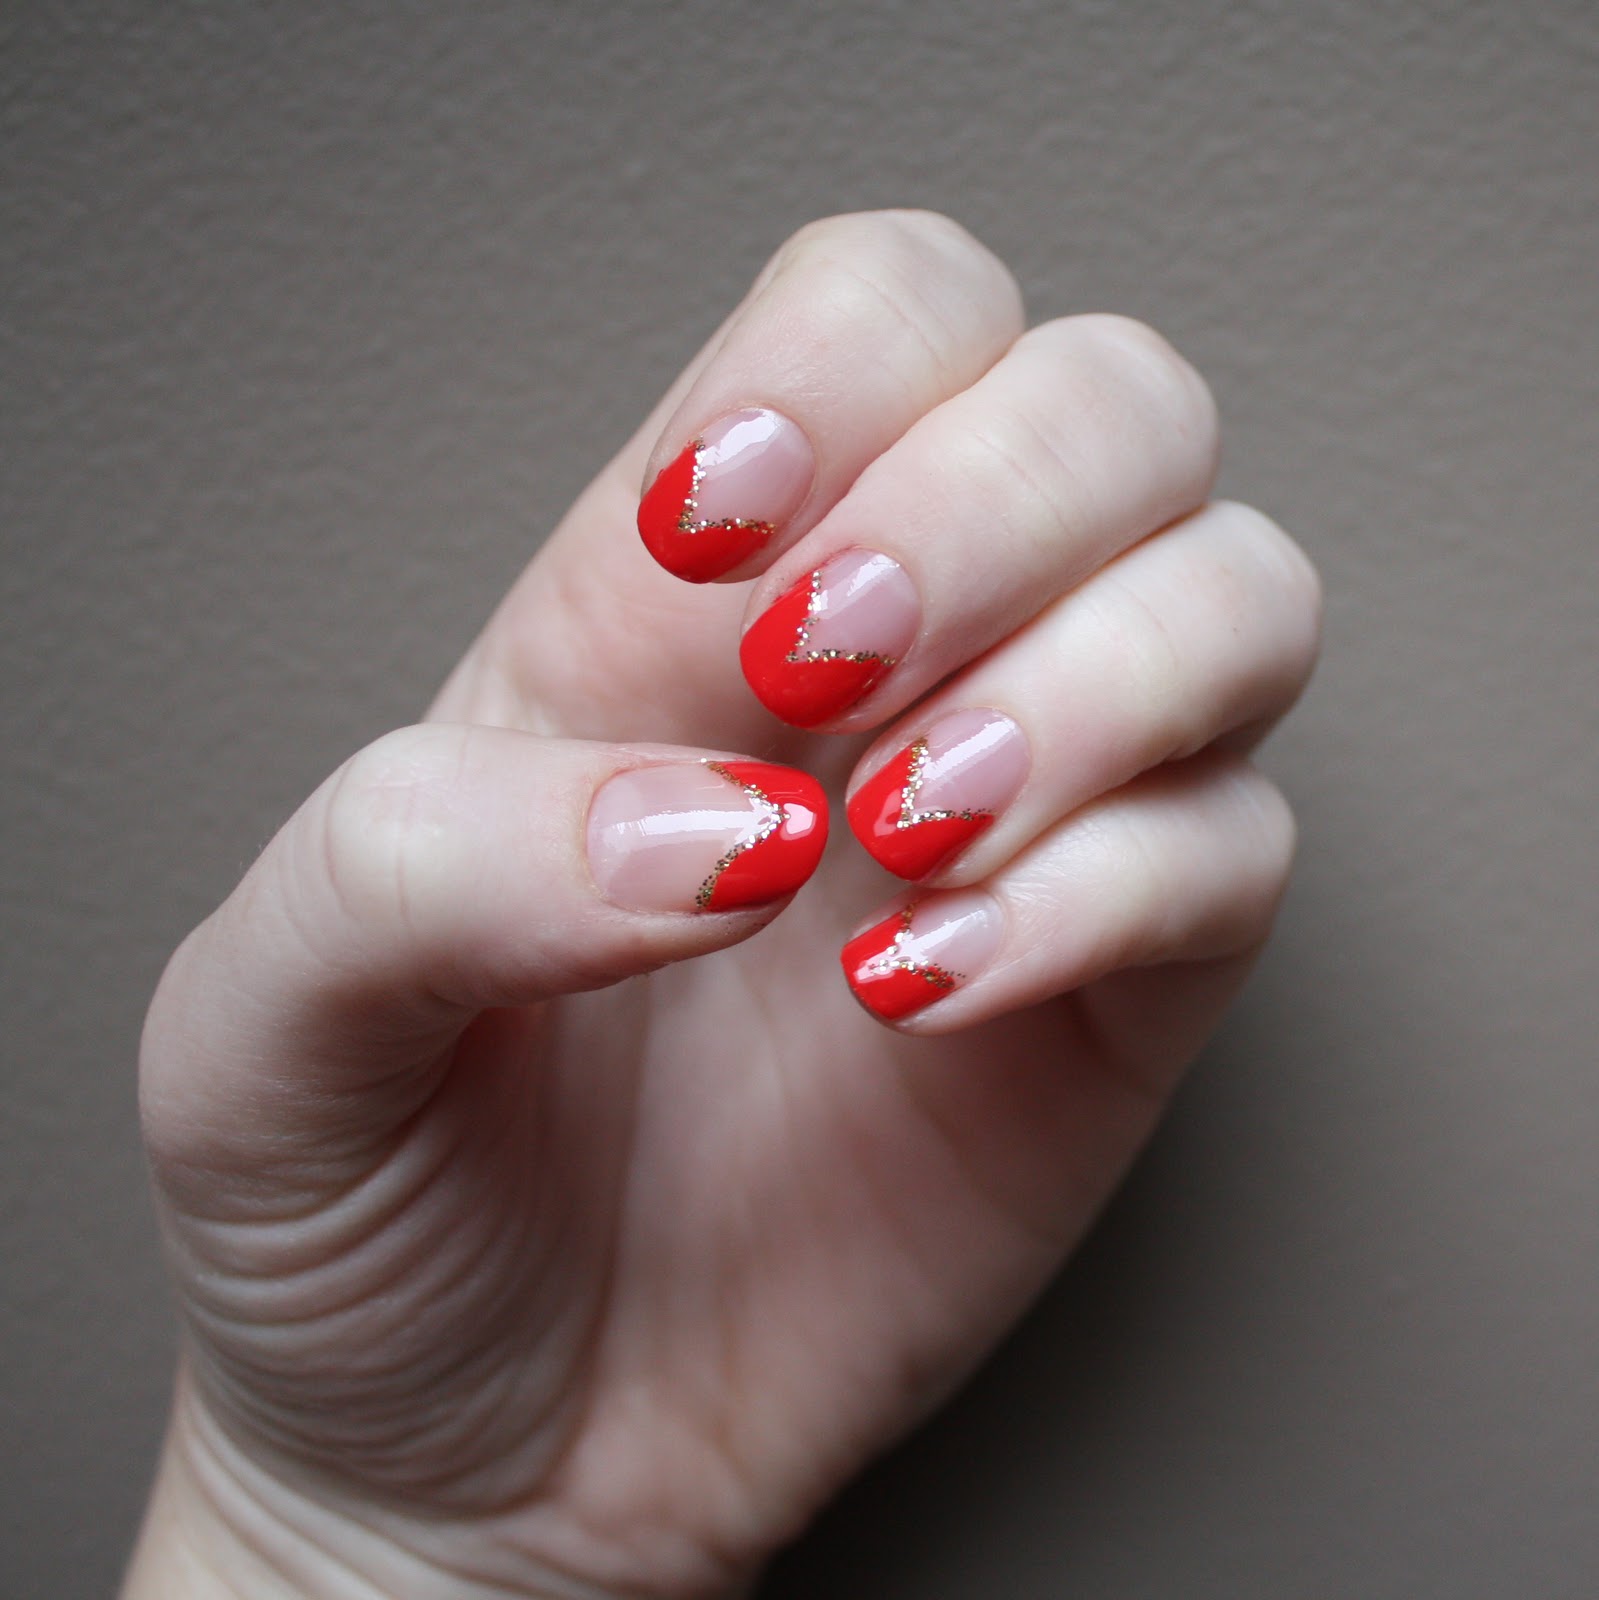
Aren't they awesome? OK - so I don't have the super long and square fake nails thing going on but I decided to try my own version of this look anyway. Plus, the bright red and thin line of gold glitter are perfect holiday party colours. So, since I knew that my bare nails would be showing, I gave them a good buff to make sure there were no discolourations. Then, I painted one coat of China Glaze's Strong Adhesion Base Coat. 

This has been my go-to base coat for a while now. It dries quickly (important) and seems to really help my manicures last longer. It gave my nails a nice subtle shininess that would accent the red and gold tips perfectly. Then, I hand-painted the rounded "V" shape onto the tips of my nails and added thin lines of gold glitter with a skinny brush. As expected, I used my favourite red, OPI's Red My Fortune Cookie.
For the gold glitter accents, I used Nicole by OPI's Twist of Fate.

This is how it turned out:

I really love how these turned out! Like the geometric christmas tree nails I posted yesterday, this manicure really elongates the nails. Plus, I'm pretty sure these nails could really work a holiday party. 


And, as promised, more Lana Del Rey.


Enjoy!
Pin It

Wednesday, 14 December 2011

Geometric Christmas Tree Holiday Manicure


Usually, when I'm thinking up ideas for cute themed manicures, I try to avoid just painting a tiny picture of something onto the nail. Instead, I like to come up with creative ways to work something into the shape of the nail so that it comes together as a whole instead of being made up of separate parts (like this and this and this). However, I do paint images onto the nails sometimes, like here and here, because it can also look really adorable.
So, when I wanted to do a manicure with something resembling a Christmas Tree, I decided to give it a geometric feel. I used Nailene's  Perfect Tips and Toes French Polish Guides to create the Christmas Tree Shape on the nail.
After a base coat, I painted one coat of Yves Saint Laurent's Gold polish. Only one coat was needed - this is a very beautiful and buttery polish. At this point, I used one coat of Seche Vite and let the nails dry for 30 minutes so that the stickers wouldn't peel the polish off.
Then, I used the Nailene stickers that were meant for toes (they are straight unlike the guides designed for fingernails) to section off a triangle on the nail.
Then, I painted OPI's Jade is the New Black as the trees.

To finish it off, I carefully peeled of the stickers and added another coat of Seche Vite. I really like the way this one turned out - it's both geometric and modern and the shape of the "trees" also elongates the nails. Plus, the gold and green are great holiday colours and look super luxurious together.


Pin It

Tuesday, 13 December 2011

Weekend of Manicures

The holiday parties are definitely happening! This weekend, I had the pleasure of visiting with and doing the nails of Tara and Yasmen. They both wanted manicures well-suited for holiday parties and we went with glitter!...how could we not?!
Tara chose Deborah Lippmann's Single Ladies, a beautiful deep red with a blue undertone.
We paired it with Lippmann's classic glitter, Happy Birthday, and ended up with a gorgeous, decadent and sparkly holiday manicure.
Yasmen went for something a little more understated and chose OPI's Suzi Skis in the Pyrenese as the base. This is definitely one of my new favourites (even though it is not that new!). I have fallen in love with it all over again after using it for my penguin manicure- it's great for a dark manicure if you want to avoid the harshness of a full-on black polish.
We topped it off with a glitter gradient on the tips using my go-to silver glitter, Orly's Tiara.
It turned out looking like a lovely snowy night sky - a great holiday manicure that could be paired with pretty much any outfit and jewelry.

I was also lucky enough to spend some time with a gorgeous birthday girl this weekend and give her a manicure as well! We decided to do her nails before her party so she could truly embrace the party girl vibe in a matchy-matchy manicure. Jess chose leopard print to match her dress and we picked out the colours accordingly. We went with a shimmery light silver, OPI's Birthday Babe (how fitting)!), and used Sally Hansen's Insta Dri in Rapid red for the spots. This is how it turned out!

And, of course, a full shot of the girl and her dress to get the full picture:

In my books, a weekend is always a blast if it involves a ton of manicures - so bring it on, holidays!
Pin It

Friday, 9 December 2011

Penguins and Holographic Snowflakes Winter Manicure


This one is so much fun! I used OPI's Designer Series Sapphire as the base on some of the nails - this polish is stunning! It's a grey holographic that shimmers so beautifully. In daylight, it's mesmerizing to look at; rainbows and sparkles as far as the eye can see. This polish is absolutely a special one. 
For the other base, I used OPI's Suzi Skis in the Pyrenees. This polish is a very dark greyish creme that goes on slightly sheer. It also has the most microscopic shimmer in it that is impossible to photograph and almost impossible to notice without staring up close. This is what they both looked like, with two coats and a top coat, flash and no flash, before the nail art: (ignore how weird my skin looks in these shots!)
I added the snowflakes with a skinny brush and the penguin bodies with a regular nailpolish brush with the same white polish (Pure Ice). Then, I added the eyes, dots, beak, and feet with a small brush.
And voila - a cute wintery manicure.


Pin It

Wednesday, 7 December 2011

Holly Holiday Manicure


How festive! I used a polish from the Muppet collection for the base, "Designer.. De Better".

I absolutely love this one. It's a metallic polish with a foil-like appearance thats has tiny coppery specks mixed into a warm silver tone. It applies very easily and is opaque after two coats. Plus, the metallic speck appearance hides any nail imperfections. Overall, a great silvery-coppery metallic and perfect for holidays because it would look amazing paired with either gold or silver jewelry.

For the holly, I used OPI's Jade is the New Black for the leaves and Sally Hansen's Insta-Dri in Rapid Red for the berries. I added the black, white, and green accents using a skinny brush.


Pin It

Tuesday, 6 December 2011

Gingerbread, Icing, and Gumdrops Holiday Manicure


The first holiday manicure! This one is a twist on the French manicure inspired by adorable little gingerbread houses. The tips emulate the piped icing along the edges of a gingerbread house along with cute tiny multicoloured gumdrops. I used Revlon's Totally Toffee as the base which is a great warm brown that actually looked lovely on its own before the nail art was added.
I also added some sparkly accents with gold near the cuticles and a tiny bit of silver along the icing line. I mean, it IS the Holidays, right!

Pin It