Friday, 9 December 2011

Penguins and Holographic Snowflakes Winter Manicure


This one is so much fun! I used OPI's Designer Series Sapphire as the base on some of the nails - this polish is stunning! It's a grey holographic that shimmers so beautifully. In daylight, it's mesmerizing to look at; rainbows and sparkles as far as the eye can see. This polish is absolutely a special one. 
For the other base, I used OPI's Suzi Skis in the Pyrenees. This polish is a very dark greyish creme that goes on slightly sheer. It also has the most microscopic shimmer in it that is impossible to photograph and almost impossible to notice without staring up close. This is what they both looked like, with two coats and a top coat, flash and no flash, before the nail art: (ignore how weird my skin looks in these shots!)
I added the snowflakes with a skinny brush and the penguin bodies with a regular nailpolish brush with the same white polish (Pure Ice). Then, I added the eyes, dots, beak, and feet with a small brush.
And voila - a cute wintery manicure.


Pin It

Wednesday, 7 December 2011

Holly Holiday Manicure


How festive! I used a polish from the Muppet collection for the base, "Designer.. De Better".

I absolutely love this one. It's a metallic polish with a foil-like appearance thats has tiny coppery specks mixed into a warm silver tone. It applies very easily and is opaque after two coats. Plus, the metallic speck appearance hides any nail imperfections. Overall, a great silvery-coppery metallic and perfect for holidays because it would look amazing paired with either gold or silver jewelry.

For the holly, I used OPI's Jade is the New Black for the leaves and Sally Hansen's Insta-Dri in Rapid Red for the berries. I added the black, white, and green accents using a skinny brush.


Pin It

Tuesday, 6 December 2011

Gingerbread, Icing, and Gumdrops Holiday Manicure


The first holiday manicure! This one is a twist on the French manicure inspired by adorable little gingerbread houses. The tips emulate the piped icing along the edges of a gingerbread house along with cute tiny multicoloured gumdrops. I used Revlon's Totally Toffee as the base which is a great warm brown that actually looked lovely on its own before the nail art was added.
I also added some sparkly accents with gold near the cuticles and a tiny bit of silver along the icing line. I mean, it IS the Holidays, right!

Pin It

Sunday, 4 December 2011

Weekend of Manicures

Leopard print definitely took over me for some reason this weekend. I know that we are technically in the holiday season but I guess I am just trying to squeeze in some crazy non-holiday party nails before its too late. I will, without a doubt, commit to some holiday manicures this week.

On Friday I was drawn to one of my favourite colours, China Glaze's Secret Periwinkle.
I decided to do leopard with a neutral background so, of course, I used my go-to greige; Deborah Lippmann's Waking up in Vegas.
For the black accents on the leopard print, I used the handy Sally Hansen nail pen. These pens are great for dotting when you aren't aiming for a flawless dot - absolutely perfect for leopard print.
This is how it turned out:
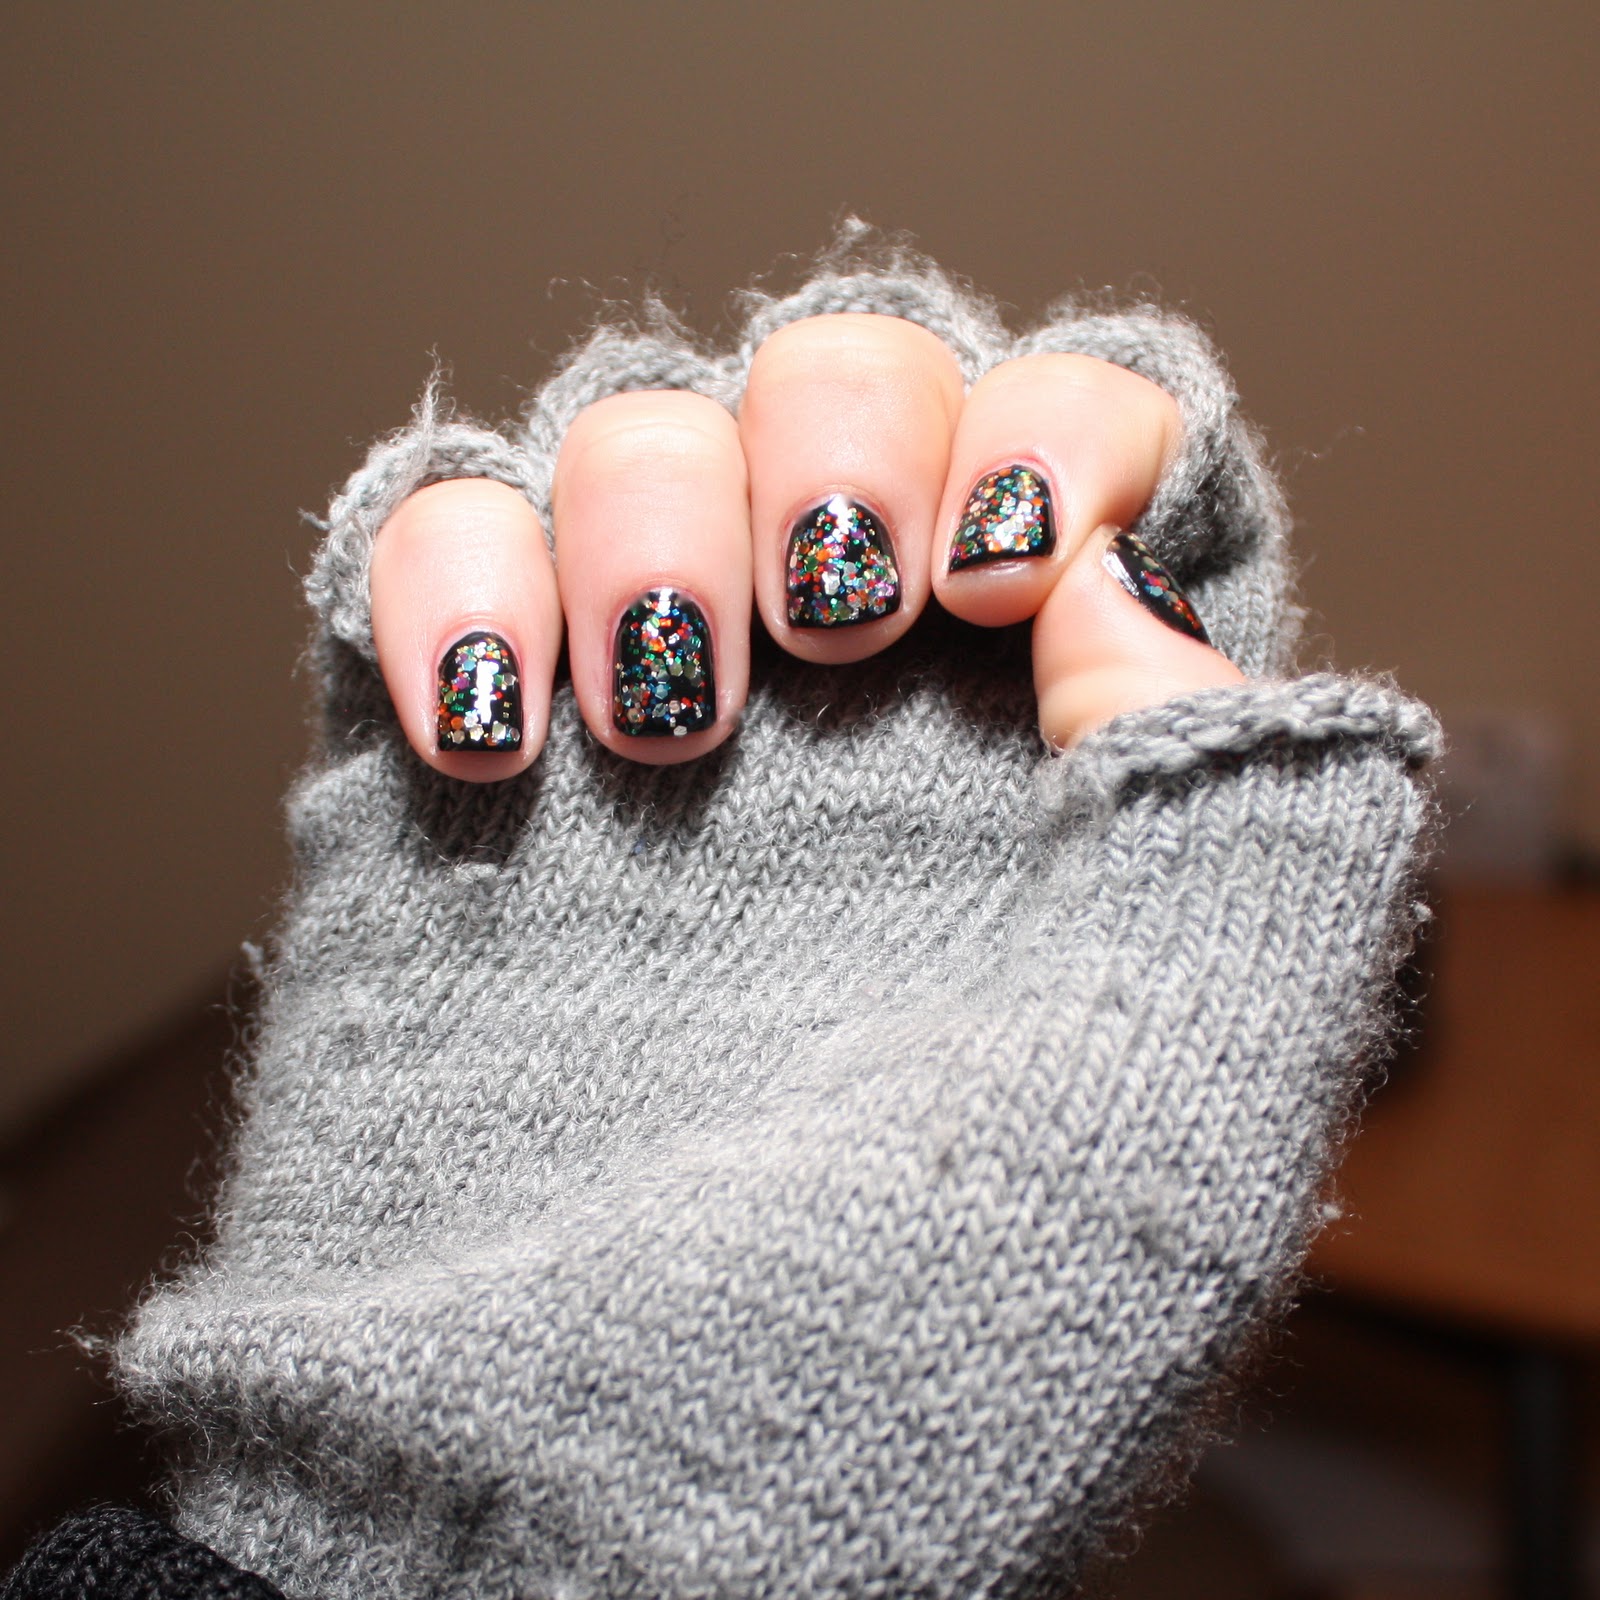
Friday night, my friends Tess and Callie asked if I had time to pop over and do some manicures and, of course, I can never turn down a manicure. Tess opted for a simple but eye-catching mani. We went for a simple base of Essie's Licorice to really showcase the glitter topcoat - Deborah Lippmann's Happy Birthday.

Described as a "party in a bottle," this glitter is truly one of the most special I have ever seen. It just becomes more awesome with every coat - something you definitely have to try for yourself. You won't be able to keep your eyes off your nails!
This is how Tess' nails ended up:
Callie spotted (pun intended) my leopard print nails and customized the colours for herself. She replaced the periwinkle with an adorable peach that Kristina got me in Scotland! It's made by Nail Paints by Barry M and is called Peach Melba.
This is how Callie's turned out - such a lovely colour combination!
Friday night was really chilly but these manicures definitely gave Tess and Callie a reason to brave the elements. If you got it, flaunt it!

On Saturday, I decided to wear this adorable light pink blouse decorated with pearls from Forever 21 and couldn't help crafting a semi-matching manicure. For the base, I used an ah-mah-zing pink by OPI called Mod About You. It's the perfect light, chalky, opaque pink. I love it.
On some of the nails, I did a hot pink leopard with Nina Ultra Pro's Punki Pink. This pink is a serious bright neon - really eye catching and super glowy.

On the rest of the nails, I used this great chunky glitter called Disco Ball that was also from Forever 21.
I definitely see this one being a part of some holiday manicures...
This is how it turned out:

This is definitely a party girl manicure. See what I said about leopard print taking over my weekend? It's just too much fun!

Next up - holiday manicures! Pin It

Wednesday, 30 November 2011

Heavy Metal Pink Zebra


Last night before heading out, I decided to give myself a quick manicure and decided on zebra. These days, in my world of nail experimentation, one solid colour manicure looks unfinished to me...losing touch with reality? Maybe.

I used two coats of OPI's Lucerne-tainly Look Marvelous as the base and a skinny pink brush for the accents.
I picked this one up at Shoppers and, for the price ($2.99), it went on quite well without clumping or being too runny. Plus, they carry a dozen or so different colours and glitter so one could really go wild.
And, of course, I finished the manicure off with our favourite top coat; Seche Vite.

A different pic:

Well, today is the last day of November and, in my eyes, the "Holiday Season" officially starts up tomorrow. And we all know what that means - holiday nail art! So, keep a lookout for the next few posts we make because they are going to involve all things sparkly, twinkly, and cozy-cute (is that a thing?). Pin It

Monday, 28 November 2011

Last night at Victoire - so much fun!

Our second date with Victoire was THE BEST! We were so excited to be fully booked and could not wait to spend our evening chatting and finding out which manicures were chosen by old and new friends alike!
We also had a lot of requests of styles seen on our blog, which really made our day. Regine said it best when she pointed out that all the different nail art options really do speak to people differently. One of the best parts was definitely customizing the colours and styles for each manicure depending on what the ladies wanted - we love to hear your awesome ideas!
We put out the best glitters on display because glitter is obviously a priority!

Here we are doing some serious work (a.k.a. having too much fun).


Here are just some of the manicures we did last night - check 'em out!
 The "While You Were on Facebook" manicure on neon orange and pink gradient
 Red roses on a neutral background
 Purple and gold leopard
 Super gold nautical
 Pink fairy nails
 Strawberry nails
 Plum roses on a pink background
 Sparkly side of the moon
 Gold diagonals on peach
 Sparkly blizzard nails
 Neon coral zebra
 Sparkly apples
Regine getting...
...an all-seeing eyes manicure!

Thanks so much for all those who booked spots with us last night! We can't wait for the next one and will let you all know as soon as a date is chosen.

Thanks again - we had so much fun!
- Emilie & Kristina

Pin It

Thursday, 24 November 2011

The secret to a perfect manicure.

The secret to a really flawlessly executed manicure is a great topcoat. Ok, well, this isn't the only "secret" there is and I suppose for a lot of people who are obsessed with nails, it's no secret at all, but for us, it's a major make-or-break step. If you're not accustomed to doing a home manicure with a topcoat, I beg you to reconsider and get one ASAP. You will see a huge difference in the appearance of your mani, as well as the longevity.

We are devotees of Seche Vite. Haven't heard of it? Well, GET WISE! You need it. 


No exaggeration, Seche Vite will change the way you do your nails and how much you end up liking your manicure. This is THE topcoat. It actually dries your polish within seconds. We don't know what we'd do if we didn't have this topcoat at the ready (other than maybe wait for each coat of nail polish to dry which is obviously asking too much).

You apply it to WET polish and it is designed to "penetrate through nail lacquer to the base coat forming a single solid coating over the nail plate for a much more durable finish" (according the Seche website). What I take away from that is that it's both science and magic. Anyway, it dries the polish super quick and provides a very shiny and durable finish over polish. For our purposes, it's necessary to have a fast drying topcoat when doing designs on the nail or else they can wear off very quickly.

There are a couple downsides to Seche Vite that we have noticed. It does occasionally 'pull' the edges of a manicure and it gets kind of gloopy quickly (when exposed to air frequently). However, the pros outweigh the cons. We have probably bought it a zillion times. Can't live without it. 

In Canada, you can score Seche Vite at Sally Beauty Supply stores and occasionally at Winners. 

This product is a MUST-HAVE. Really.  Pin It